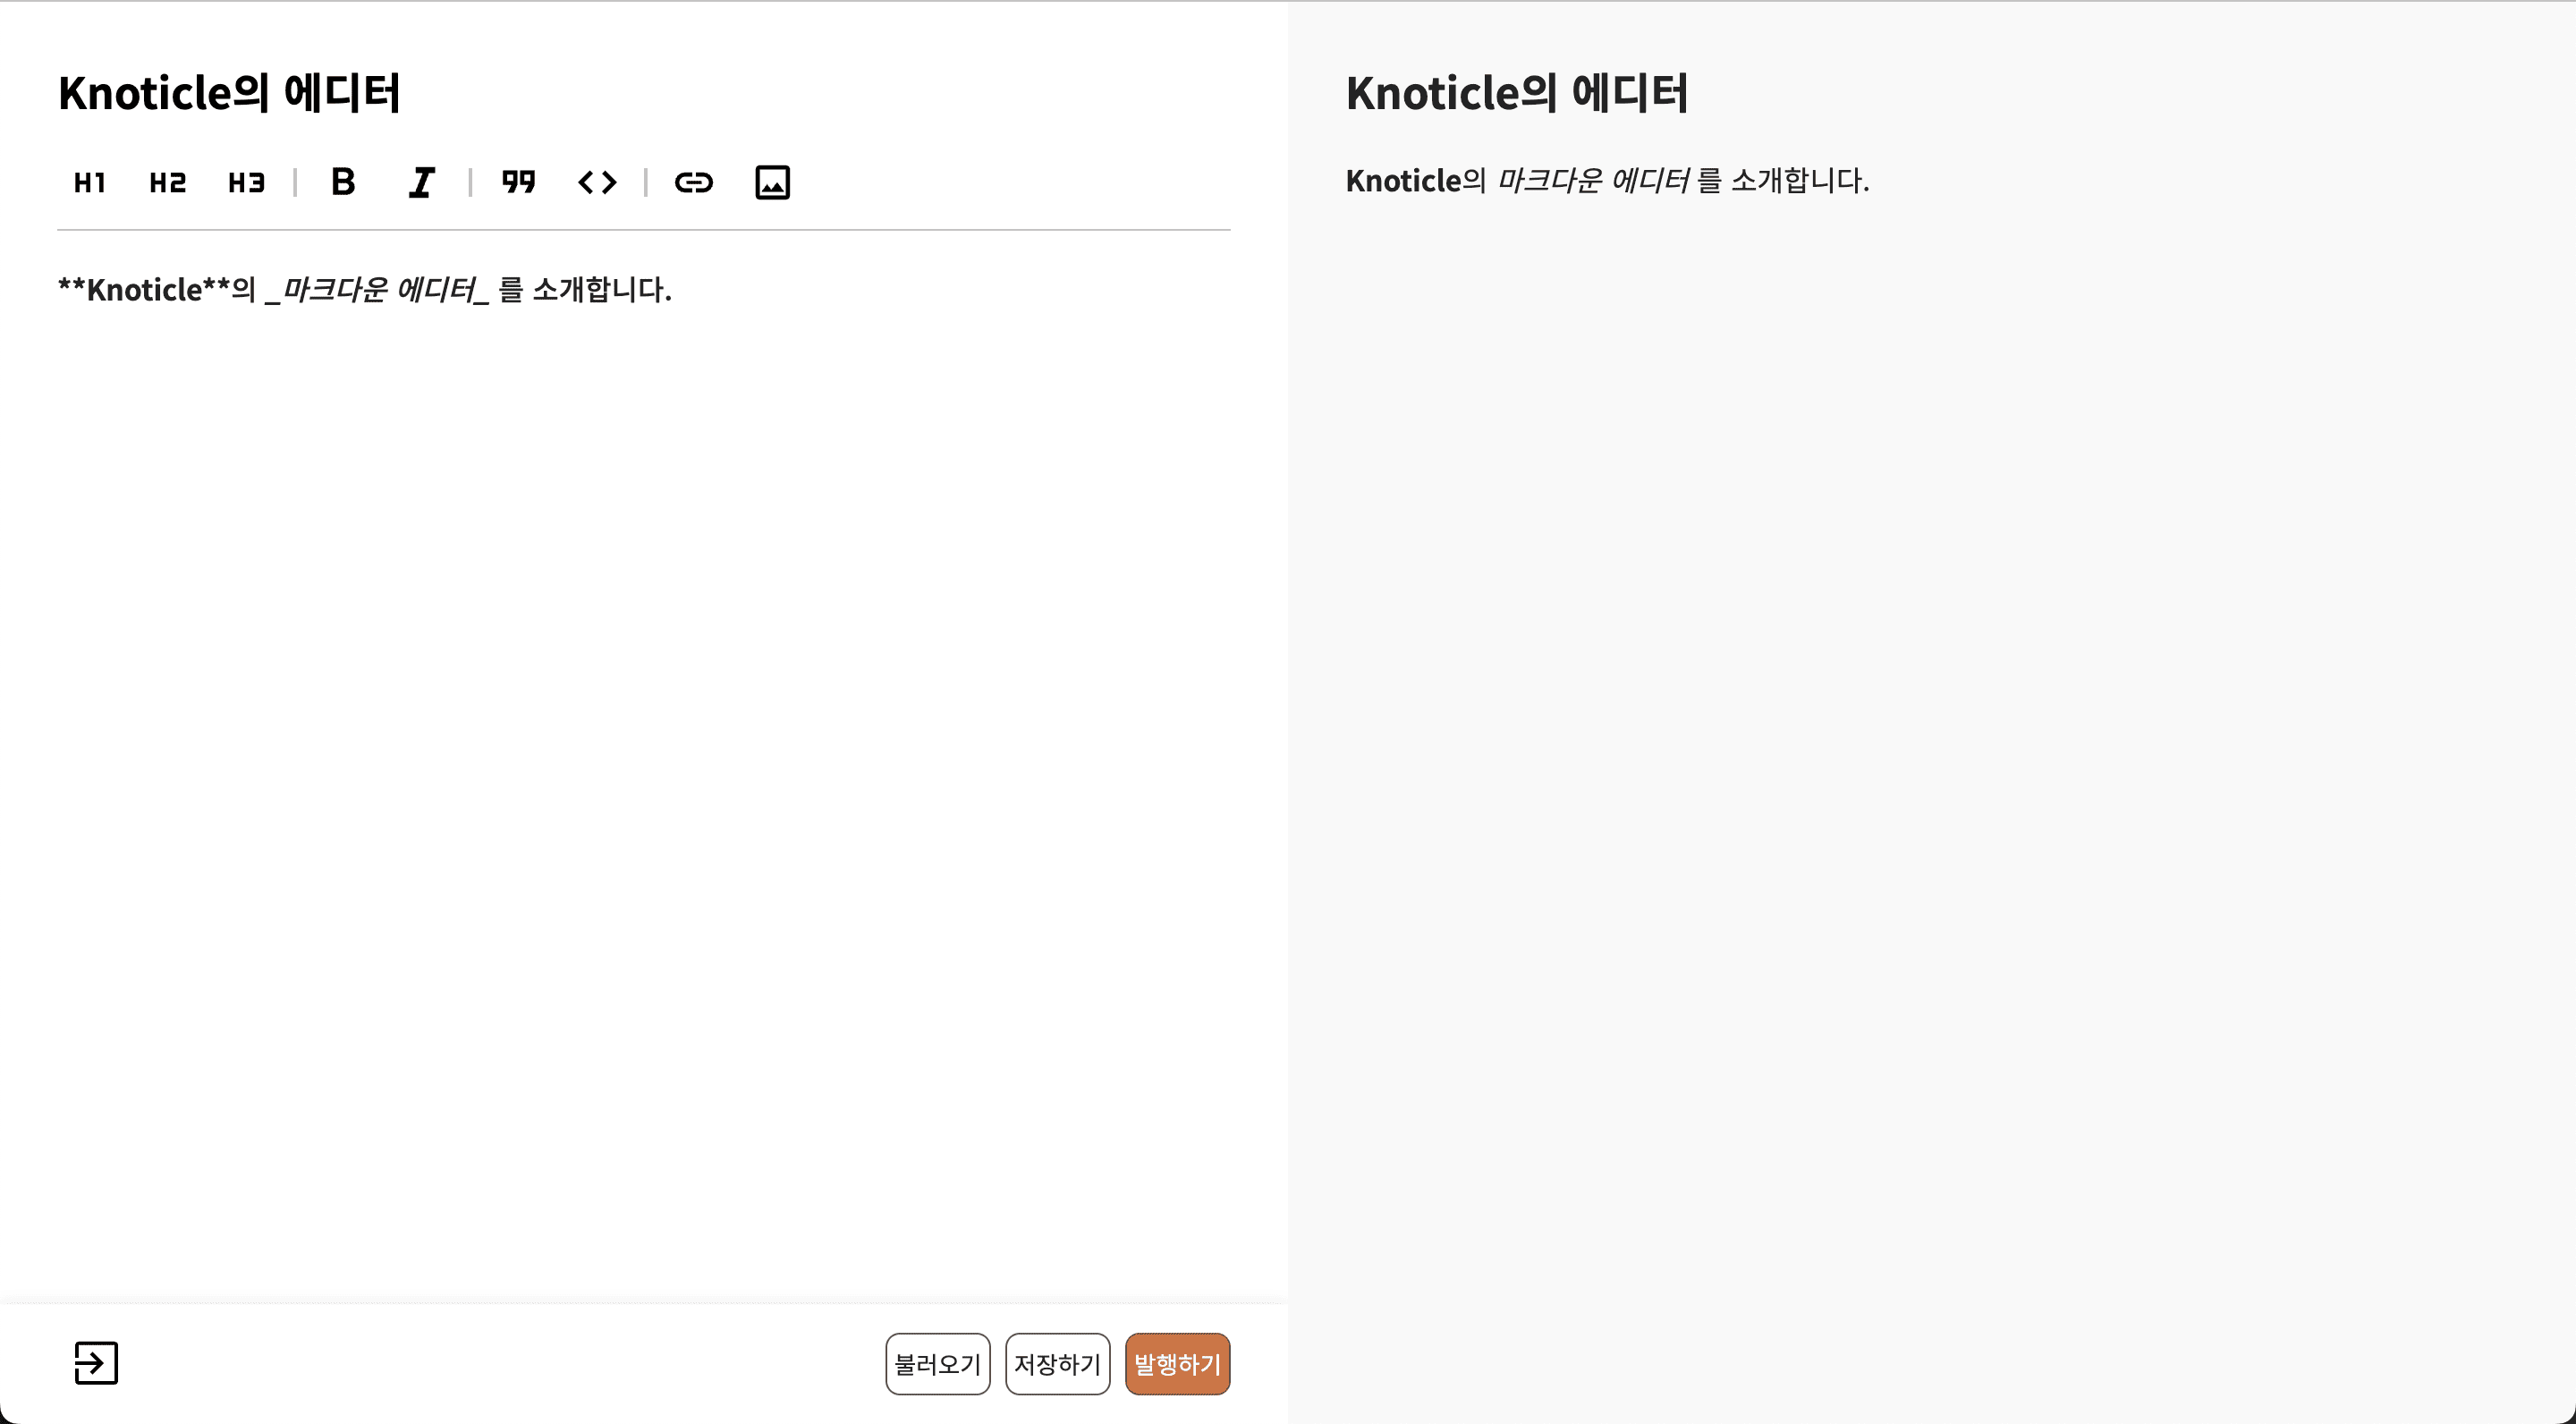
글의 가치를 올려주는 에디터
Knoticle 서비스에서 글 작성 환경은 중요한 요소입니다. 사용자들이 글을 편집하고 공유하기 위해서는 텍스트뿐 아니라 이미지 첨부나 다양한 스타일을 지원하는 에디터가 필요합니다.
이번 글에서는 이런 요구를 충족하기 위해 마크다운 에디터를 개발한 과정을 소개합니다.

CodeMirror 에디터 활용하기
코드미러(CodeMirror)는 브라우저에 코드 편집기를 제공하는 자바스크립트 구성 요소이다. 풍부한 프로그래밍 API를 보유하고 있으며 확장성에 초점을 둔다.
CodeMirror는 브라우저에서 코드 편집기를 제공하는 JavaScript 라이브러리로 다양한 확장 기능을 손쉽게 추가할 수 있습니다.
이 에디터를 활용해서 다음과 같은 기능을 구현했습니다.
- 마크다운 구문 강조
- 에디터 테마 커스터마이징
- 단축키 설정
- 커서 위치 확인
이러한 기능들을 재사용 가능하도록 훅으로 만들어 글쓰기 페이지 외에도 댓글 기능 등에서 활용할 수 있도록 했습니다.
import { useCallback, useEffect, useState } from 'react';import { markdown, markdownLanguage } from '@codemirror/lang-markdown';import { languages } from '@codemirror/language-data';import { EditorState } from '@codemirror/state';import { EditorView } from 'codemirror';export default function useCodeMirror() {const [element, setElement] = useState<HTMLElement>();const ref = useCallback((node: HTMLElement | null) => {if (!node) return;setElement(node);}, []);useEffect(() => {if (!element) return;const editorState = EditorState.create({extensions: [markdown({base: markdownLanguage,codeLanguages: languages,}),],});const view = new EditorView({state: editorState,parent: element,});return () => view?.destroy();}, [element]);return {ref,};}
이제 여기에 여러 가지 기능을 추가하면서 서비스에 맞는 에디터를 만들 수 있습니다.
이미지 첨부하기
텍스트만으로는 한계가 있을 때 이미지가 유용합니다. 여러 가지 방법으로 이미지를 첨부할 수 있도록 기능을 구현했습니다.
- 파일에서 복사해서 붙여넣기
- 드래그 앤 드롭으로 첨부하기
- 첨부 버튼을 통해 선택하기
위 과정은 이벤트 감지(붙여넣기, 드롭, 버튼 클릭) → Knoticle API 서버에 이미지 저장 요청 → 반환된 이미지 URL을 에디터에 삽입으로 이루어집니다.
이미지 붙여넣기
코드미러 익스텐션에 추가할 이벤트 핸들러를 작성해줍니다.
const eventHandler = () => { ... }const editorState = EditorState.create({extensions: [...,eventHandler(),]})
코드미러의 domEventHandlers를 활용해서 붙여넣기 이벤트를 처리할 수 있습니다.
에디터에 포커스가 위치한 상태에서 붙여넣기 이벤트가 발생하면 clipboardData를 가져올 수 있는데 이 데이터가 이미지 파일인지 검사해서 서버에 전송합니다. 서버에서는 이미지 파일을 Object Storage에 저장하고, 저장된 URL을 반환합니다.
const handleImage = (imageFile: File) => {if (!/image\/[png,jpg,jpeg,gif]/.test(imageFile.type)) return;const formData = new FormData();formData.append('image', imageFile);createImage(formData); // Knoticle API 서버에 요청};const eventHandler = () => {return EditorView.domEventHandlers({paste(event) {if (!event.clipboardData) return;const { items } = event.clipboardData;for (const item of items) {if (!(item.kind === 'file')) return;handleImage(item.getAsFile() as File);}},});};
저장된 URL을 반환받았다면 마크다운 이미지 문법인  형식으로 에디터에 추가합니다. 이때 자연스러운 UX를 위해서 붙여넣은 커서의 위치에 추가합니다.
const insertCursor = (text: string) => {if (!editorView) return;editorView.focus();// 아래와 같이 에디터의 현재 커서 위치를 알아낼 수 있습니다.const cursor = editorView.state.selection.main.head;editorView.dispatch({changes: { from: cursor, to: cursor, insert: text },selection: { anchor: cursor + text.length },});};useEffect(() => {if (!editorView) return;const markdownImage = (path: string) => ``;const text = markdownImage(image?.imagePath);insertCursor(text);}, [image]);

이미지 드래그 앤 드롭
이 방법은 이벤트 핸들러만 추가해주면 위에서 작성한 코드들을 재사용할 수 있습니다. 앞서 작성한 코드들은 재사용이 용이하도록 함수마다 하나의 책임만 가지고 있습니다.
이미지를 드롭할 때 마우스 커서에서 가장 가까운 곳에 이미지가 첨부될 수 있도록 에디터 커서의 위치를 조정해줍니다. 코드미러의 posAtCoords 메서드로 현재 마우스 커서와 가장 가까운 에디터 커서의 위치를 알아낼 수 있습니다.
const eventHandler = () => {return EditorView.domEventHandlers({...,drop(event, view) {if (!event.dataTransfer) return;const cursorPos = view.posAtCoords({ x: event.clientX, y: event.clientY });if (cursorPos) view.dispatch({ selection: { anchor: cursorPos, head: cursorPos } });const { files } = event.dataTransfer;for (const file of files) handleImage(file);},});};

이미지 첨부 버튼 클릭
이 방법은 input 태그를 통해 이미지 파일을 받아오는 방식이기 때문에 코드미러 익스텐션을 이용하지 않고, 직접 HTML 태그를 작성합니다. 이후에는 앞서 작성한 함수들을 재사용합니다.
<inputid="image"type="file"accept="image/png,image/jpg,image/jpeg,image/gif"onChange={(event) => {if (event.target.files) handleImage(event.target.files[0]);}}/>

마크다운 스타일 버튼 추가하기
마크다운에서는 여러가지 문법을 이용해서 텍스트를 풍부하게 꾸며줄 수 있습니다.
- 블록 스타일: h1(#), h2(##), h3(###) 등
- 인라인 스타일: bold(**), italic(_), quote(`) 등
이런 스타일들은 직접 작성할 수 있지만, 편의성을 위해 버튼 클릭만으로 스타일이 적용되도록 제공합니다.
이 기능을 제공하기 위해선 현재 에디터 커서의 위치와 커서가 위치한 곳의 문자열을 파싱하는 것이 중요합니다. 이와 관련된 함수를 작성하고, 커스텀 버튼들을 나열해서 각각의 클릭 이벤트 핸들러에 연결 시켜줍니다.
블록 스타일
블록 스타일은 현재 커서가 위치한 라인에 블록 스타일 마크다운 문법이 적용됐는지 확인해야합니다. 라인에 스타일이 적용되어있으면 해제하고, 해제되어 있으면 적용시켜주도록 토글 방식으로 구현합니다.
코드미러에서 제공하는 lineAt 메서드로 현재 커서가 위치한 라인의 정보를 얻을 수 있습니다.
// symbol -> '# ', '## ', '### ' 등const insertStartToggle = (symbol: string) => {if (!editorView) return;editorView.focus();const { head } = editorView.state.selection.main;const { from, to, text } = editorView.state.doc.lineAt(head);const hasExist = text.startsWith(symbol);if (!hasExist) {editorView.dispatch({changes: {from,to,insert: `${symbol}${text}`,},selection: {anchor: from + text.length + symbol.length,},});return;}editorView.dispatch({changes: {from,to,insert: `${text.slice(symbol.length, text.length)}`,},});};

인라인 스타일
인라인 스타일은 현재 에디터에서 선택된 텍스트에 마크다운 문법이 적용됐는지 확인해야합니다. 블록 스타일과 마찬가지로 토글 방식으로 구현합니다.
코드미러에서 제공하는 sliceDoc 메서드로 에디터에 작성된 텍스트 일부를 잘라낼 수 있습니다. 선택된 텍스트 양쪽에 마크다운 문법이 적용됐는지 확인합니다.
만약 선택된 텍스트가 없다면 defaultText와 함께 선택한 마크다운 문법을 적용해서 에디터에 표시해줍니다.
// symbol -> '**', '_', '`' 등const insertBetweenToggle = (symbol: string, defaultText = '텍스트') => {if (!editorView) return;editorView.focus();const { from, to } = editorView.state.selection.ranges[0];const text = editorView.state.sliceDoc(from, to);const prefixText = editorView.state.sliceDoc(from - symbol.length, from);const affixText = editorView.state.sliceDoc(to, to + symbol.length);const hasExist = symbol === prefixText && symbol === affixText;if (!hasExist) {editorView.dispatch({changes: {from,to,insert: `${symbol}${text || defaultText}${symbol}`,},selection: {head: from + symbol.length,anchor: text ? to + symbol.length : to + symbol.length + defaultText.length,},});return;}editorView.dispatch({changes: {from: from - symbol.length,to: to + symbol.length,insert: text,},selection: {head: from - symbol.length,anchor: to - symbol.length,},});};
